My Tech Home sometimes uses Affiliate Links where the blog author sometimes receives a commission.
Digital Preparation & Hygiene
Before we touch the hardware build itself, there is a small piece of groundwork that is easy to skip and considerably more annoying to fix after the fact. I know this because I have had to fix it after the fact.
Trust me on this. The scope of this project expanded over time — motion sensors, indoor cameras, a full-time care package — and having done things properly from the start made each addition substantially less painful.
We need to assign static IP addresses to the devices that matter on our network. If you skip this step, your router can hand out a different address after a reboot, and the link between Home Assistant and the Sky Q box will simply stop working — with no obvious error message to explain why.
Log into your router by opening a browser and trying 192.168.0.1, 192.168.1.1 or 192.168.100.1. Your router’s manual will tell you which, and for Sky or Virgin routers it is usually printed on the label on the bottom of the box. If you are stuck, Google your router model and “how to log in” — someone will have written it up.
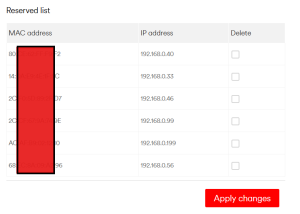
You are looking for the DHCP server settings. On my Virgin Media router, that is Advanced > DHCP:
…. and on a TP-Link router, Advanced > Network > LAN Settings:
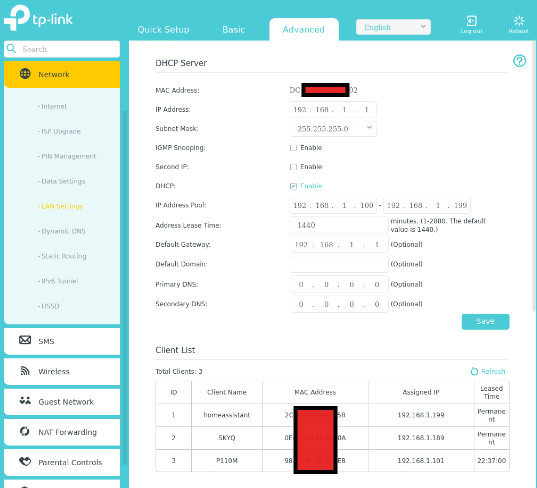
Assign a fixed IP address to both the Raspberry Pi and the Sky Q box. The specific addresses do not matter — just pick numbers that do not clash with devices already on the network. I assigned .189 and .199 respectively. When you come to write the automation code that actually sends commands across the network, you will be very glad this is already done.