My Tech Home sometimes uses Affiliate Links where the blog author sometimes receives a commission.
Building the Hardware
Every piece of hardware in this build was designed to be easy to put together. Physical assembly genuinely is the simple part. Once you are into the Home Assistant configuration itself, that is where the complexity lives — and where the coffee supply becomes less of a luxury. But we are not there yet.
Building a Raspberry Pi
A Raspberry Pi is not a desktop PC. Everything is on one circuit board — it is a single-board computer by design — and for this project there are no additional expansion modules, hats or attachments needed. You are fitting a board into a case and connecting a fan cable. That is genuinely the extent of it.
For context: I do have a second Pi running as a media centre, and that one does have an NVMe m.2 SSD hat with four large SSDs attached. That is an entirely different story and entirely irrelevant to what we are doing here.
Because I wrote this guide after installation rather than during it, there are no step-by-step photographs to show you.
The Amazon product images for the kit I have linked above do show the assembly clearly though, and the instructions that come in the box are actually quite good.
Most kits follow the same sequence regardless of brand.
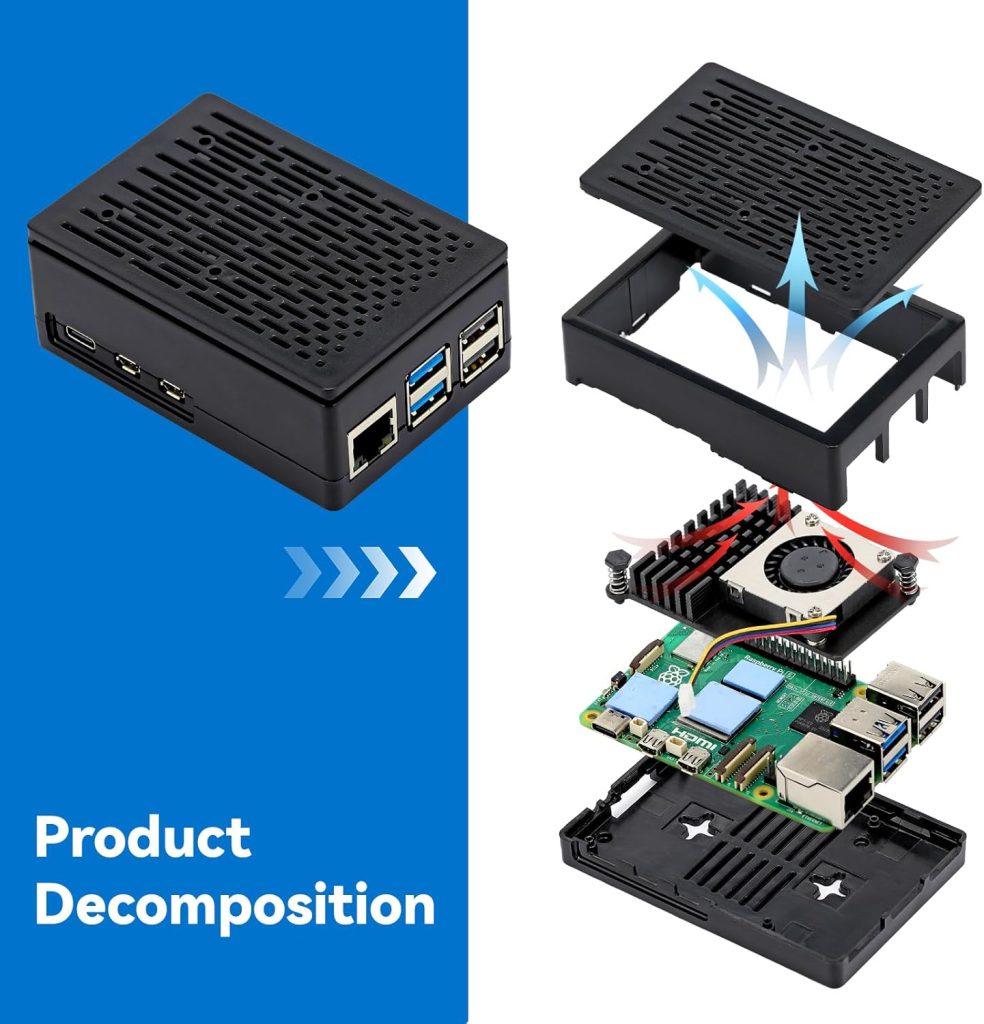
The process for most kits is essentially:
- Apply the thermal pads to the Pi board
- Attach the fan using the push-fit clips and connect the fan power cable to the board
- Place the Pi into the case
One thing worth checking before you start: some cases require the microSD card to be inserted into the Pi before it goes into the case. Others do not. Kits are inconsistent on this point. Find out which yours is before you have the board halfway assembled and have to take it apart again.
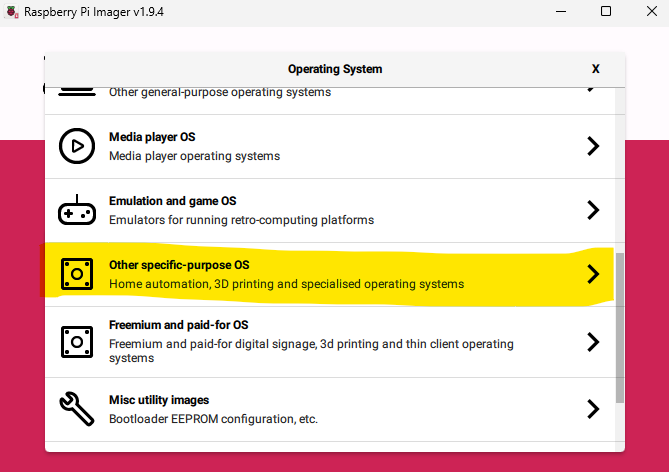
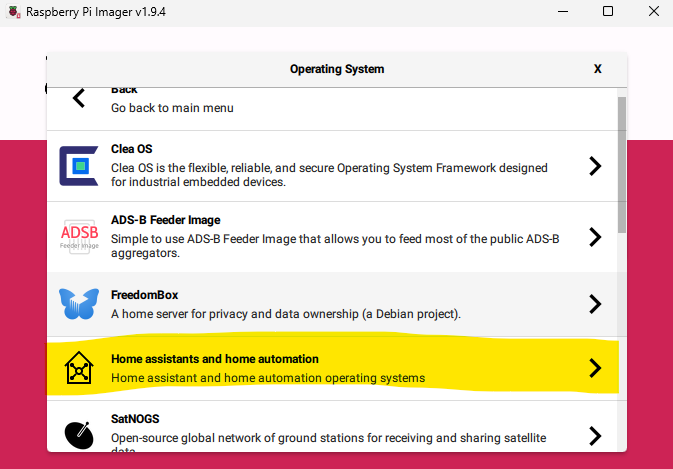
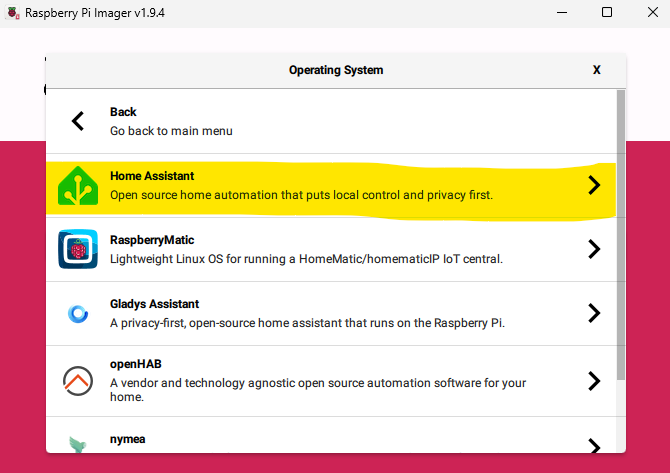
Preparing Home Assistant for the microSD card
The simplest route here is a Windows machine, because Raspberry Pi provide a dedicated imaging tool that walks you through every step. The most challenging part of the entire process — and I say this without exaggeration — is locating Home Assistant in the list of available operating systems:
Beyond navigating the menus, select your Pi model, choose the drive letter your microSD card has mounted as, and let the software handle everything else. It will confirm when the process is complete and when it is safe to remove the card.
Plug it all in!
Windows, iOS, Android — it does not matter, as long as you have a web browser available. That is all you need to configure Home Assistant from this point forward.
Connect the Raspberry Pi to the router using an ethernet cable and apply the power. A Pi 4 or earlier will start booting automatically; on the Pi 5, press the power button. First boot takes a few minutes — leave it alone and let it get on with the job.