My Tech Home sometimes uses Affiliate Links where the blog author sometimes receives a commission.
Building the Hardware
The great thing about all of the parts that I have selected for my Sky Q project is that they are all easy to set up and configure out of the box. As you can imagine, once you get into the development of the Home Assistant itself then that is where the complications begin and you need a coffee or something stronger.
Building a Raspberry Pi
Building a Raspberry Pi is not like building a full sized PC. This is a single board computer where everything you need is installed on a single computer board. Well almost – there are different attachments which if you are looking to expand your development can be added – but for this Sky remote project they are not necessary.
Sub note: I do actually have a second Pi which I am using as a media centre. This is one example where I have bought a NVME m.2 SSD “hat” and installed 4 large SSDs.
Now because I offered to do this quick guide after installation, I can’t actually walk you through with pictures.
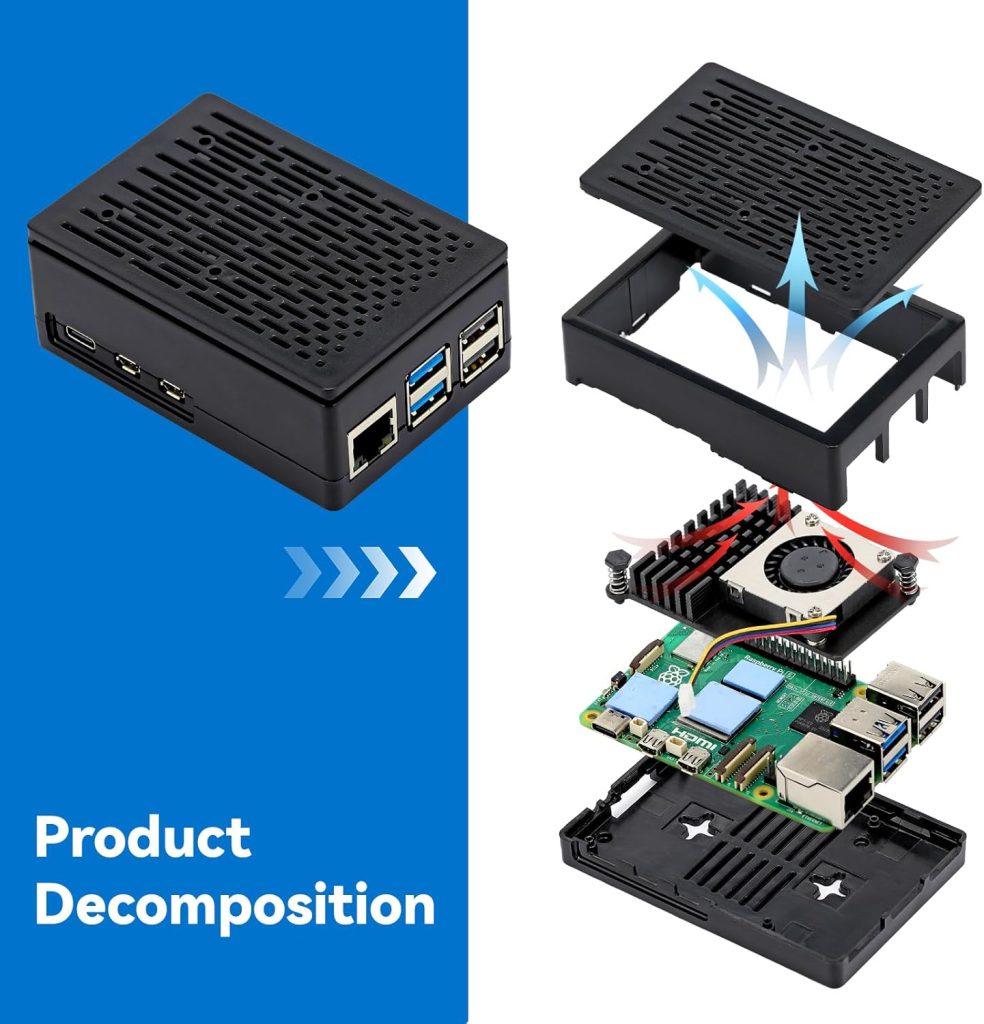
This Amazon image in the Pi with case that I have already linked to has a really simple explanation of how it all goes together though.
The instructions are also actually pretty good in the box.
Some Raspberry Pi kits do vary though, but most come with pretty good instructions.
- Put the heat pads on the Pi
- Use the push clips on the fan to attach it to the Pi and connect the fan power to the board
- Place in the case
SOME cases require you to insert the microSD card into the slot on the Pi before going in the case, some after…. bare that in mind!
Preparing Home Assistant for the microSD card
I have found the easiest way to install the Home Assistant operating system onto the microSD card is to use a Windows computer or laptop.
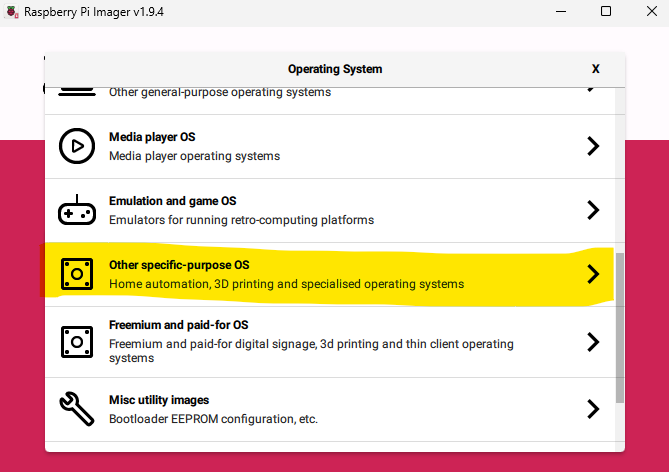
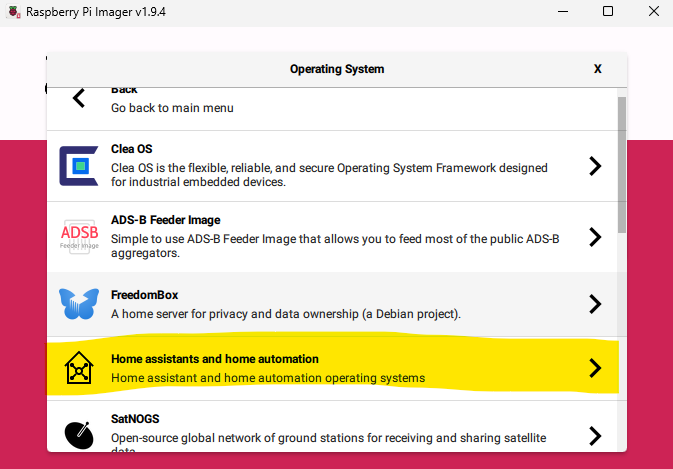
This is because Raspberry Pi have a full installation tool on their website that quite literally walks you through every step. The hardest part of installing the Home Assistant operating system is actually finding it in the list of options:
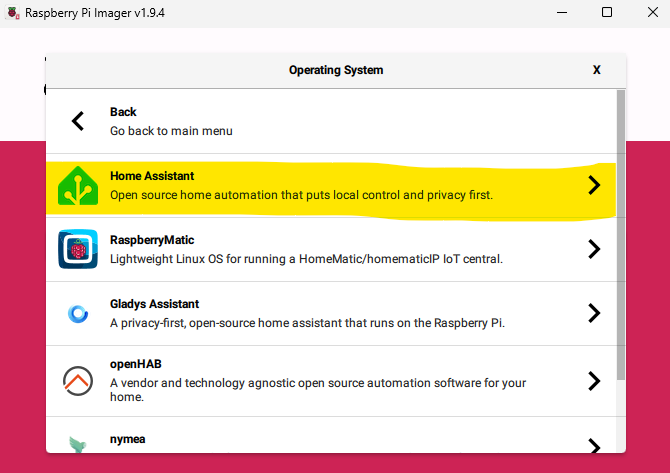
The rest of the options should be pretty intuitive based on what Raspberry Pi model you bought and what drive letter your new microSD card has mounted as. The software does all the rest and tells you when to remove your new Home Assistant OS install.
Plug it all in!
Whether you are using a Windows, iOS or Android device to configure your new Home Assistant it does not matter as long as you have a web browser.
All you need to do next is connect the Raspberry Pi to the router using an ethernet cable and plug in it’s power supply. A Raspberry Pi 4 or earlier will start booting automatically or you press the power button on the Pi 5.
2 thoughts on “My Home Assistant Project – Equipment & Software”