My Tech Home sometimes uses Affiliate Links where the blog author sometimes receives a commission.
Digital Preparation & Hygiene
Before we tackle your Home Assistant operating system we may have to do a little bit of preparation first. You need to make sure that everything has a place, and as I have found out taking shortcuts can lead to more problems that it solves!
Trust me, when a family member wants to add motion sensors and indoor cameras into the scope you have to make sure you do it right!
So we want to make a few notes. We need to create static IP addresses on our home network for all our new connections.
Step one is to go into our router. In most cases you will want to go into your web browser and access an IP such as 192.168.0.1, 192.168.1.1 or 192.168.100.1 and it will prompt you to log in. Your router instruction booklet will probably help, or if you use a Virgin, Sky or similar residential router it is probably printed on the box. If you get stuck, just Google your router and “how to log in” and it should help you out.
We need to go into the routers DHCP server. In the case of my Virgin Media router it is under Advanced > DHCP.
…. and for TP-Link routers it should be Advanced > Network > LAN Settings
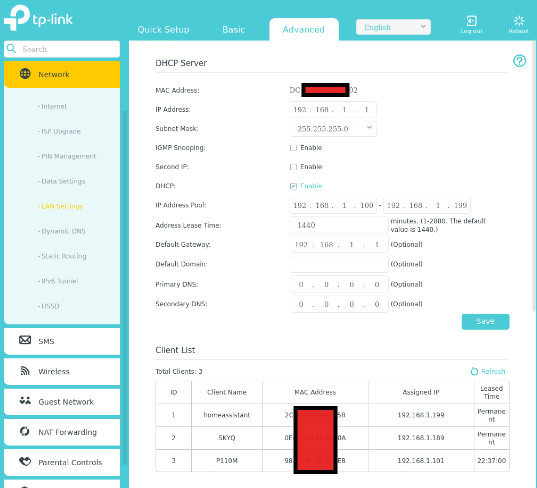
What we need to do in this section is set all the components that we need with an assigned IP address. This will make things easier when we come to start writing the actual code that we need to use to send commands across the system. If you do not assign a static IP to your Sky TV box, if your router changes the IP on a reboot then the link will be broken.
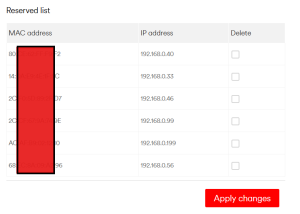
It does not matter what IP addresses you use, but if there are already devices on the network then you should consider setting addresses away from them. As you can see above, I have assigned 189 and 199 to the Home Assistant and Sky Box.
2 thoughts on “My Home Assistant Project – Equipment & Software”